Annotate, pixelate and frame screenshots on your Mac
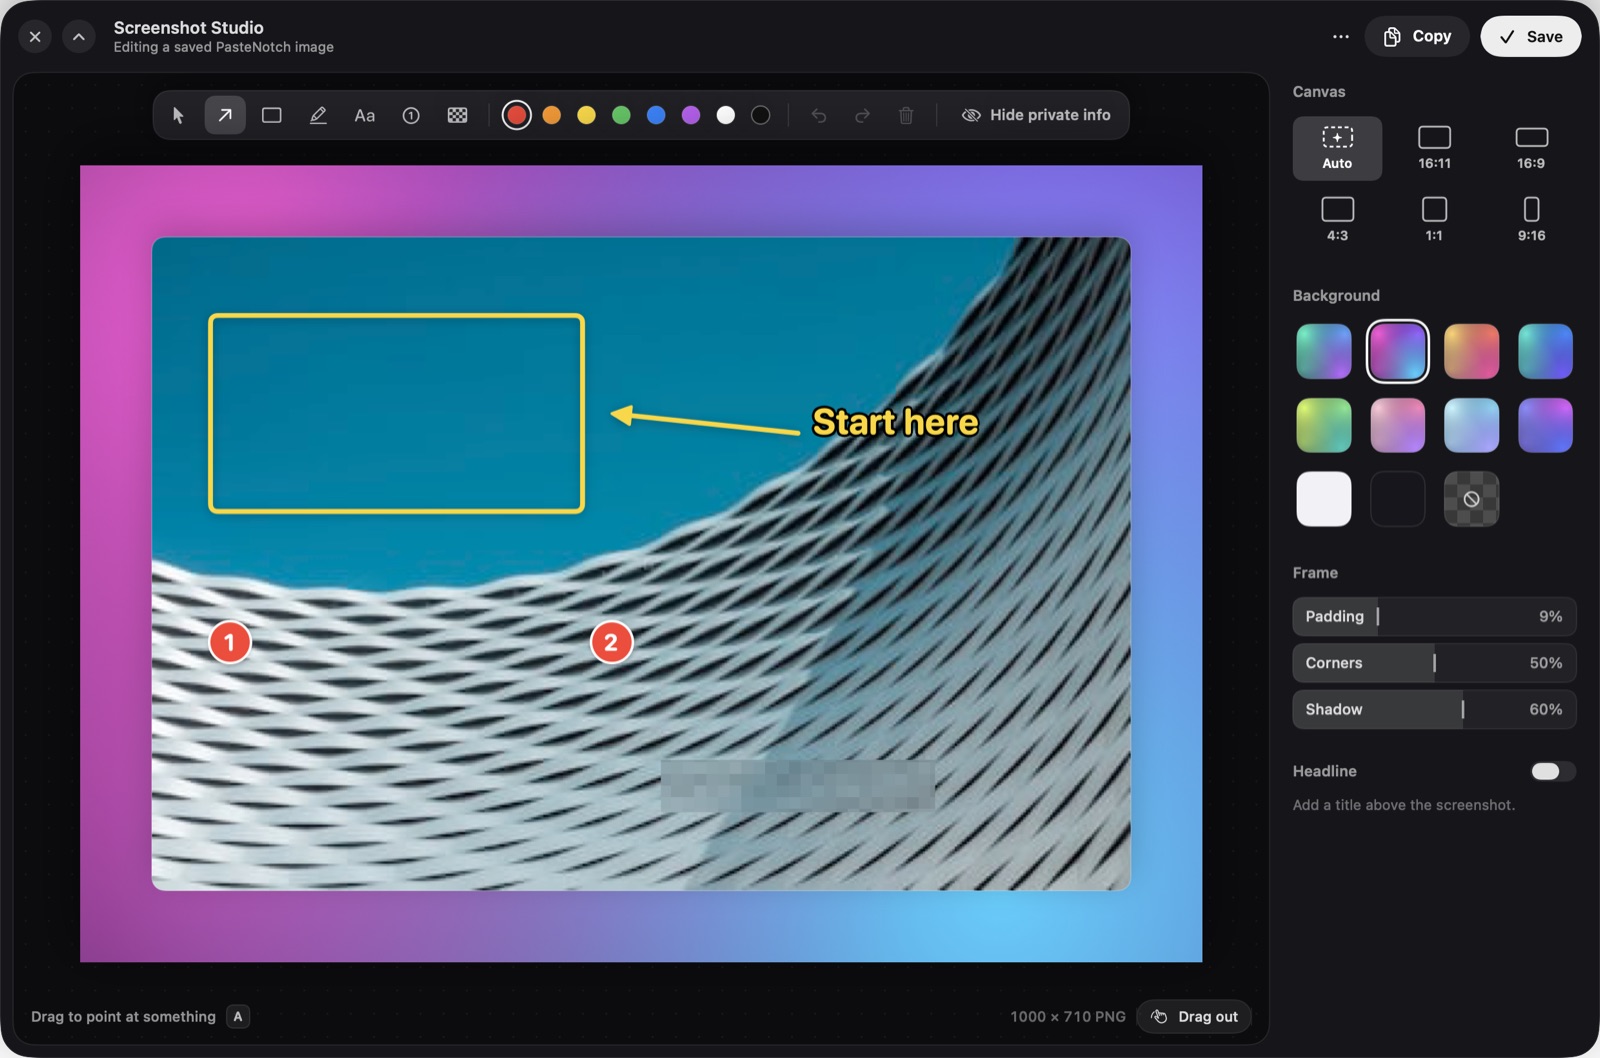
Screenshot Studio lets you mark up a screenshot, hide private details and put it on a background, then copy, save or drag it out. It is part of PasteNotch Cloud, which includes PasteNotch, a clipboard manager for Mac that lives in the notch.
How do you open a screenshot in Screenshot Studio?
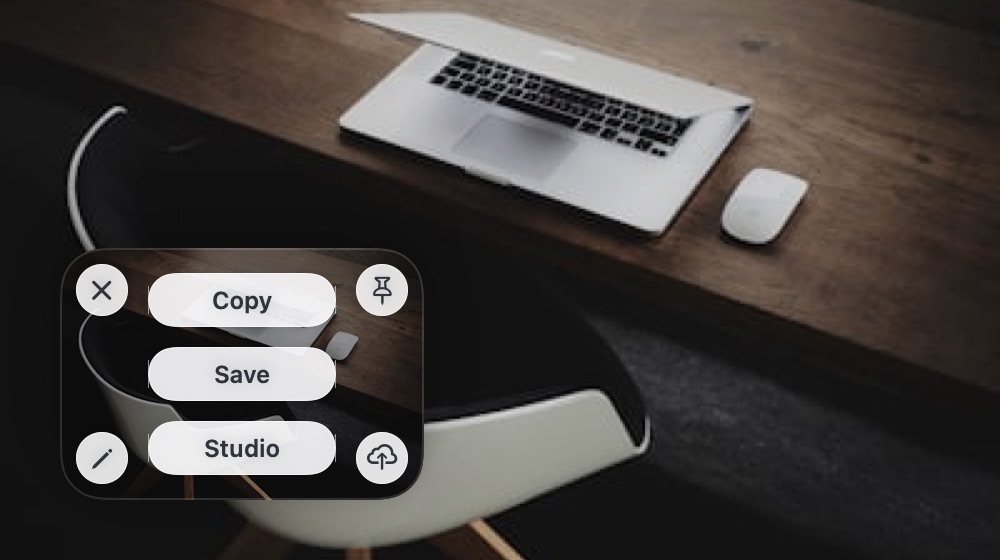
Take a screenshot with PasteNotch: ⌃⇧4 for an area or ⌃⇧3 for the whole screen. A small card appears with Copy, Save and Studio. Click Studio.
You can also choose Screenshot Studio… from the PasteNotch menu. Then pick an image already in PasteNotch, open an image file, paste one with ⌘V or drop one onto the window.
Which annotation tools are there?
All tools live in one floating bar above the image. Each has a single-key shortcut.
| Tool | Key | What it does |
|---|---|---|
| Select | V | Click a mark to move it, or drag a handle to resize it. |
| Arrow | A | Drag to point at something. |
| Box | R | Drag to box an area. |
| Highlight | H | Drag across text to highlight it. |
| Text | T | Click where the note should go, then type. |
| Step | N | Click to drop numbered steps in order. |
| Pixelate | P | Drag over private details. |
There are eight colors (keys 1 to 8). Undo with ⌘Z, redo with ⇧⌘Z and delete the selected mark with ⌫.
How do you redact private info in a screenshot?
Click Hide private info or press ⇧⌘R. PasteNotch reads the text in the image on your Mac and pixelates what looks private:
- email addresses and phone numbers
- IP addresses
- card numbers and IBANs
- API keys and tokens
Each find becomes a normal pixelate mark, so you can move it, resize it or delete it. Anything it missed, cover by hand with P.
Can pixelated text be reversed?
Not from the finished image. Pixelate takes its colors from the screenshot underneath, so an email hidden on a dark app stays dark and one on a white page stays light. Each block is also blended with its neighbors, so the hidden text can't be read or rebuilt from the blocks.
When you edit an image that's already in PasteNotch, Save replaces it in your history with the edited version.
How do you add a background and padding?
The panel on the right sets up the frame around your screenshot:
- Canvas: Auto, which fits the image, or 16:11, 16:9, 4:3, 1:1 and 9:16.
- Background: eight gradients, plain light, plain dark or none.
- Frame: Padding, Corners and Shadow sliders. Drag across them or use the arrow keys.
- Headline: an optional title above the screenshot.
The bottom bar shows the final image size. When you're done, use Copy (⌘C), Save (⌘S, which saves to PasteNotch and copies), Save as PNG File… (⇧⌘S), or drag the image straight into another app.
Want to see it first? Try the interactive Screenshot Studio sample with a safe sample image.
Do you need PasteNotch Cloud for Screenshot Studio?
Yes. Screenshot Studio is one of the capture tools, along with screenshots, copying text from an area and screen recording. They come with PasteNotch Cloud, $4.99 a month with 25 GB of storage, which includes the PasteNotch app. Existing lifetime owners keep their capture tools.
The clipboard manager on its own is $4.99 once after a 14-day free trial.
Get Screenshot Studio with PasteNotch Cloud
Capture tools, a web library and 25 GB of storage for $4.99 a month, with the PasteNotch Mac app included.